Ergotron Neo-Flex HD & DS100 Triple-Monitor Stand Review - The Hardware
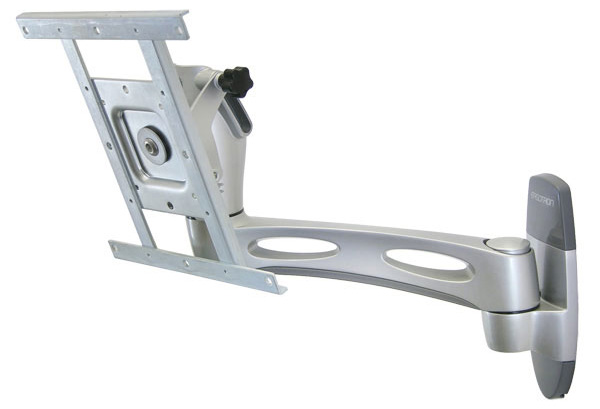
Neo-Flex HD Wall Mount Swing Arm
Included Hardware
The Neo-Flex HD Swing Arm kit includes the wall bracket, the swing arm, the 75mm x 75mm VESA monitor bracket, VESA adapters for larger monitors (100mm x 100mm, 200mm x 100mm, and 200mm x 200mm), and the mounting hardware (2 lag bolts, washers, and other assorted screws). It also comes with installation instructions and an ergonomic guide.
Installation
The installation instructions are very simple.
- Find a stud
- Drill pilot holes
- Use the two lag bolts to secure wall mount in place
- Place swing arm onto wall mount
- Attach the VESA 100mm adapter (if needed)
- Attach the VESA mount to your monitor
- Place the monitor onto the swing arm
This simple list should not serve as a replacement for the actual installation instructions. Please ensure you read all the directions before installing one on your own. This mount is designed to hold 50 pounds, and needs to be properly secured to a wall stud. Also, please ensure that install the monitor at the proper ergonomic height. Since the monitor will be permanently attached to the wall, and not have a height adjustment, proper height is key. I initially installed my 3007WFP too high, and ended up with constant neck and back pain. After reinstalling the monitor at a proper height, the pain disappeared.
With the monitor bracket and the arm being two separate pieces, the placement of the monitor is very simple. When I originally attempted to install the HD45, the arm and monitor bracket was one piece. After attaching it to the monitor, it became heavy and unweildy when trying to place it on the wall mount (another reason the HD45 isn't suited for residential installations).
Performance
 Performance is hard to define for a wall mount monitor arm. It's not something that is easily benchmarked. The arm provides three degrees of freedom. It offers a 180 degree pan, a 180 degree arm swing, and a tilt with -5/+15 degree range of motion. The arm moves and articulates easily in the pan and swing movements. Even a 30" panel is easily moved with one hand. The tilt movement is performed by first loosening a screw, making the adjustment, and then re-tightening the screw. I set the tilt only once, when I first installed the monitor, and it was easy.
The real benefit comes from getting the monitor up and off your desk. My 30" panel was originally sitting in the corner of my desk. I also ran wires such as USB cables and speaker cables through holes in the back corner of that same area. It was a significant pain to make changes to my setup, as I had to work around the large panel, which filled the entire corner. With the Neo-Flex HD, I was able to simply move the monitor out of the way to rearrange anything in that area of my desk.
Pulling the monitor up off the desk allowed me to place other items on my desk, where the monitor stand had once been. This provided a significant improvement in making maximum use of my desk space. The Neo-Flex also has a cable track, to help reduce cable clutter on your desk.
Conclusions
I have absolutely nothing bad to say about the Neo-Flex. It is attractively designed, installs easily, and performs perfectly. The benefits of mounting your monitor on the wall, and getting rid of the monitor stand can't be overstated. I would highly recommend the Neo-Flex HD to anyone looking for a simple monitor arm for a large display panel. If you have smaller (and thus lighter) monitor, and are looking for something with a height adjustment, Ergotron also offers the LX Wall Mount.
DS100 Triple-Monitor Stand
Included Hardware
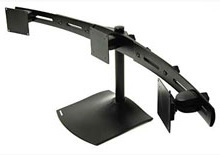
The DS-100 Triple Monitor kit includes the base stand, the center arm bracket (good for installing two monitors), two arm extensions (needed for three monitors), 75mm VESA mounting brackets, 100mm VESA adapters, and mounting screws. Like all Ergotron products, it comes with full installation instructions and an ergonomics guide.
Installation
Installation of the DS-100 is an deceptive mix of "quite easy" and "daunting." The initial steps to assemble the monitor stand are very easy.
- Screw the mounting pole into the base
- Secure the mounting pole with screws
- Attach the center arm to the pole, and tighten
- Attach the arm extensions to the center arm
- Screw the VESA mounts to your monitors
- Attach the center monitor to the center mounting location
 Here is where it gets hairy. The instructions then show attaching both the left and right monitors in the same step. But, without an extra pair of hands, this is impossible. And, attaching one monitor at a time will cause the whole assembly to topple over - I know from experience. My strongest recommendation is to get someone to help you in attaching the outside monitors. This allows you to set the bar height at the appropriate level first, and then attach the last two monitors.
Otherwise, you have to come up with a work-around. I ended up lowering the arm so that the center monitor rested on the base. I then attached one outside monitor. It did cause the assembly to tip, but because the monitors were basically touching my desk already, it only tipped about a 1/4". I then attached the last monitor, and fought to raise the monitor bar. I think I ended up needing help in the end.
With help, the installation is dead simple. Without it, you are in for frustration and fear of seeing hundreds of dollars in LCD panels crashing to the floor.
Performance
The monitor arm performs quite well, but it does have its frustrations. The monitors attach securely, and easily. But, I have yet to get all three monitors to line up perfectly. The largest issue is that the outer monitors sit about an 1/8" lower than the center. I believe this is because the monitor arms are torquing (twisting) down slightly, causing the monitor to drop. It's not a big issue, and is really only evident when starting at the Windows desktop. The offset is entirely unnoticeable when gaming. It hasn't bothered me enough to contract Ergotron yet, but I probably will before too long. If I get a solution, I will update this review.
I also have a slight gap between each of the monitors. This is caused because the monitors move slightly as you screw down the knob for the bracket. This later issue could probably be corrected with getting a second person to hold the monitor in position as you tighten the knob.
Conclusion
In the end, the arm performs its function of holding the three monitors securely. But the anal-retentive part of me wishes I could get the monitors to line up perfectly. I wish that Ergotron made a wall-mount that was designed to support three monitors, and I wish the bar was one rigid piece. But, without that option, I was forced to utilize a simple mod to attach the DS-100 bar to a Neo-Flex HD Wall Mount Swing Arm. Continue reading for details on that.
