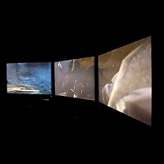
This blog post is dedicated to my personal DIY curved screen. I made this screen to show the capabilities of Warpalizer together with a curved screen, for showing media on YouTube, showing customers and to learn more about this subject myself, as I'm pretty new to this. I will try my best to make a DIY post to show you that a curved screen does not have to be expensive. With small changes on this "design" you can make a screen in a corner. Please read on and do not hesitate to ask any questions.
Preparations
Start by measuring the desired room; make sure your girlfriend/wife is okay with you using the room. If not, buy wine/roses or take her out on a nice dinner. Alternatively, you could try this approach (I did):

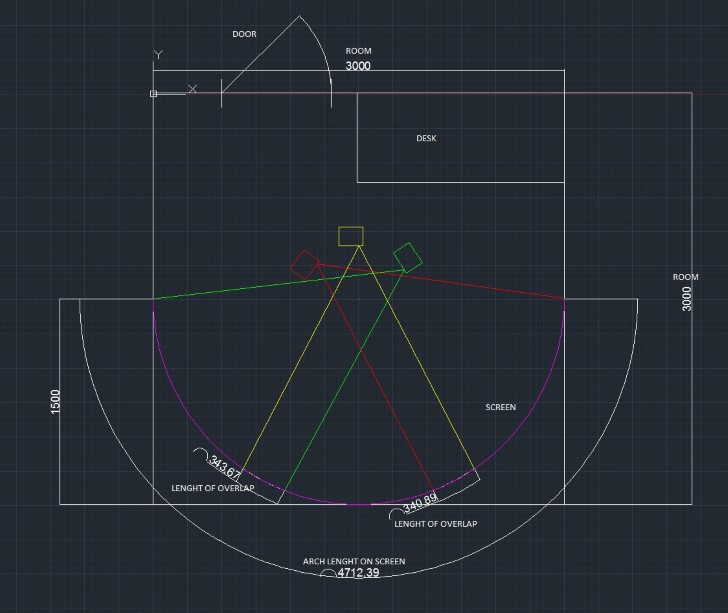
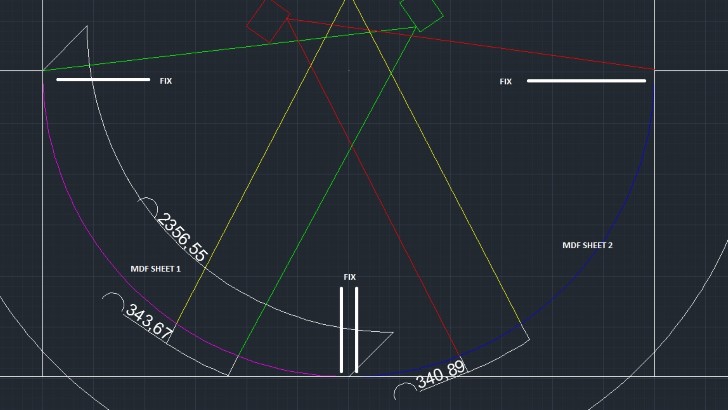
My room of choice is 3x3m, so I decided to use half of the room. Imagine a circle that is 3m in diameter, cut it in half and you have a 180-degree half-circle that has 1.5m depth/radius. Please check that your projectors will fill the image both horizontally and vertically (I tried holding the projectors and mounts up against the roof many times to check). I used AutoCAD to draw everything, so I could use the measures in my drawing. (The measurements on the AutoCAD drawing is in millimeters)
Find your desired material of choice; I used
4mm MDF sheets, these can bend but still they are strong. These MDF sheets is 2.4x1.2m when purchased (in Norway), so you may have to do some cutting.
I marked on the walls where the sides of the screen was going to be, the middle of the screen and where the top/bottom of my screen was going to be.
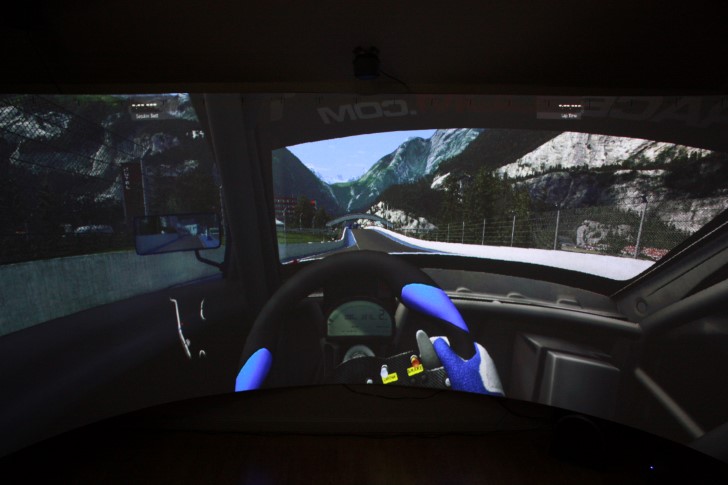
I wanted the screen to be 1.2m tall; as I have tried setup’s that isn’t that tall and I feel that it is not the immersive feel that I’m after.
I used two MDF sheets for my screen, so I cut both the sheets down to 2.356m (half of the arch length), since I wanted the screen to be 1.2m tall there was no cutting involved on the width. (The measurements on the AutoCAD drawing is in millimeters)
The Process
I had a friend over to help me hold and bend the MDF sheets and hold the leveling tool while getting the MDF sheets fixed to the wall. The MDF sheets needs to be in level on top and on the sides, or else they will sag on the middle where they have no support. Please remember that the screws has to sit more than flush with the MDF sheets as you should use bondo to cover the screws before painting, same with the middle of your screen where the two MDF sheets meet each other.
When you are finished mounting the screen to the wall, the boring part awaits you, bondoing and sanding. Ask your friend to help you, tell him that he can play on your screen when it's finished if he does the sanding! Alternatively, your girlfriend/wife, tell her that she can watch “Magic Mike” on the screen when it's finished if she does the sanding!
After bondoing and sanding comes paint. The person in the store told me to use primer on mine, so I did. The paint code I used is
S1500-N (I do not know if this is international). I used two layers of paint. Remember to have proper ventilation.
When setting up the projectors I started with the middle projector as my setup has three projectors. Fill a little bit more than 1/3 of the screen, be sure that the projector is centered and then continue with the left and right projector. Remember that you want to “waste” as little pixels as possible, so try to get as much picture as possible onto the screen. For overlapping, I usually try to get 10%.
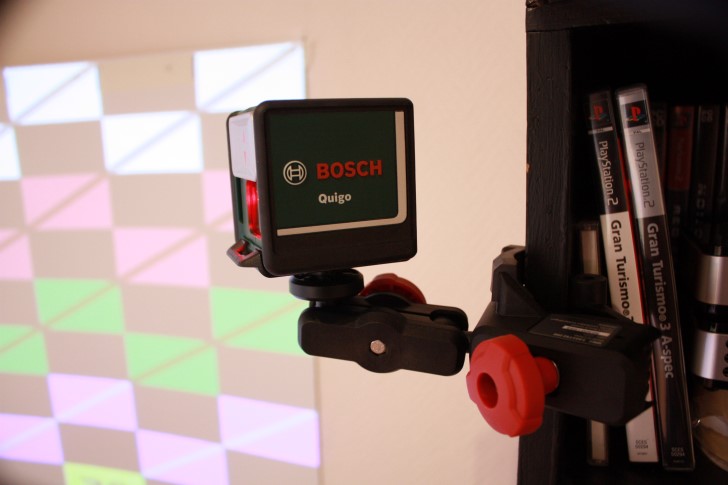
As I work with Warpalizer, it was the obvious choice for warp and blend software for me. To setup any warp and blend software, you should have a self-leveling cross line laser at hand.
This is mine, Bosch Quigo. This is easy to work with since it has a great holder with clamps. It is cheap too! (Yeah, I was a Gran Turismo fan)
Grocery List
For this screen I used:
- 2pc 4mm MDF sheets
- Drywall screws
- Bondo
- Sandpaper
- 1 liter primer
- Approx 2 liter paint
In the next blog post, I will share some photos of the setup of Warpalizer.
Does anyone have tips for setting up the camera for taking pictures? It is a Canon EOS 450D. I have two lenses available.
_________________
Marius Skinnes - Support Engineer Univisual Technologies AB -
http://www.warpalizer.comContact me at
[email protected] for questions about Warpalizer.